How to Schedule Reels on Facebook [3 Easy Methods]

Looking for how to schedule Reels on Facebook? This guide will help!
As a small business owner, you understand the importance of maintaining a strong social media presence, but balancing that with running your daily operations can be challenging.
Creating quality content, especially engaging Facebook Reels, takes time – time that you may not always have. This often leads to the search for efficient solutions that maximize your marketing impact without stressing yourself out.
Facebook Reels, with their short and captivating format, are perfect for showcasing your products, sharing your brand story, and connecting with your target audience.
However, manually posting these Reels can be time-consuming. But what if you could schedule your Reels in advance? Of course, that’s going to come as a huge help.
So, in this guide, we will show you three easy methods you can explore when looking to schedule Reels on Facebook. It will provide you with simple steps to plan your video content effectively!

Table of Contents
- 1 But Why Schedule Facebook Reels?
- 2 #1: How to Schedule Reels on the Facebook – Using Facebook App
- 3 #2: How to Schedule Reels on Facebook with Meta Business Suite
- 4 #3: How to Schedule Reels on Facebook Using a Third-Party Tool
- 5 How to Edit Facebook Reels After Scheduling Them
- 6 Facebook Reels vs. Instagram Reels: Which Offers the Best Opportunity?
- 7 Comparing Meta Business Suite and OnlySocial for Reels Scheduling
- 8 Pro Tips for Scheduling Reels on Facebook
- 9 Conclusion
- 10 FAQS
But Why Schedule Facebook Reels?
Not many entrepreneurs know the value of having their social media content scheduled, including Facebook Reels.
Because of this, many have not been utilizing the feature and so are struggling with keeping up with managing their social media presence and running their business.
If you also fall into this category, let’s take a moment to quickly show you some amazing benefits you can enjoy from scheduling your Reels – before showing you how to schedule Reels on Facebook.
It Saves You Precious Time
When you choose to schedule your Facebook Reels in advance, you can free up valuable time that you can dedicate to other important aspects of your business.
Instead of having to stop what you’re doing to post content, you can plan everything ahead and let the automation take care of it.
It Ensures Consistent Posting
Consistency is key to building and maintaining an engaged audience. Scheduling your Facebook posts allows you to post regularly without missing a beat, even on your busiest days.
This consistency helps keep your brand top of mind for your followers and potential customers.
It Helps You Reach Your Audience at the Right Time
Not all times of the day are equally good for posting. Scheduling your Reels allows you to post when your audience is most active, increasing the chances of your content being seen and engaged with. This strategic timing can boost your reach and interaction rates.
It Reduces Stress and Last-Minute Rushes
By planning and scheduling your content in advance, you eliminate the stress of having to come up with a post on the spot. You’ll have more time to craft high-quality, engaging Reels without the pressure of a looming deadline.
It Allows You to Plan a More Effective Content Strategy
Scheduling gives you the opportunity to plan your content calendar more effectively. You can align your Reels with upcoming promotions, events, or seasonal trends. That way, you can be sure your content will be timely and relevant to your audience.
Now let’s go see how you can schedule Reels on Facebook. The guide will be showing you three methods; scheduling through the Facebook app, through Meta Business Suite, or a third-party tool.
#1: How to Schedule Reels on the Facebook – Using Facebook App
Scheduling a reel directly from the Facebook app is a straightforward process that allows you to plan your content with ease.
So, if you prefer to work on scheduling your Reels on the go, this will be a great option for you. Here are the steps to follow:
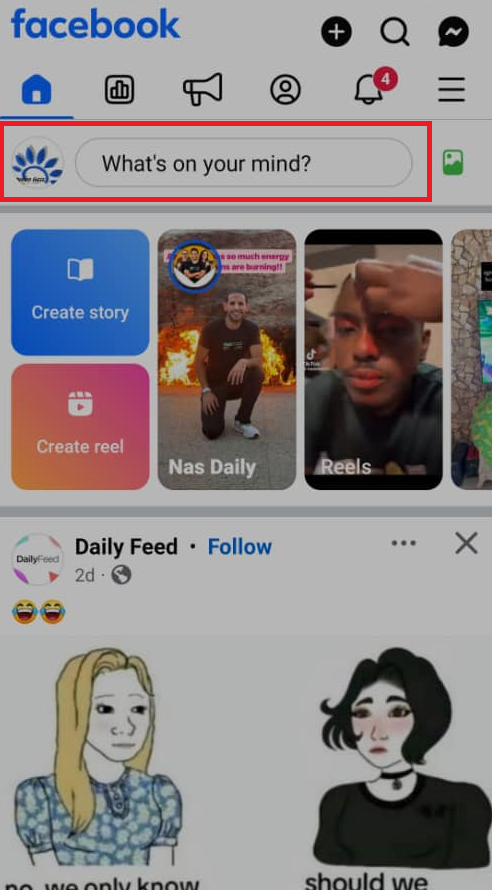
Step 1: Open the Facebook App
Start by opening the Facebook app on your mobile device. Tap on the “What’s on your mind” tab at the top of the page to begin creating a new reel.
Step 2: Select Your Video
Choose the video you want to use for your reel. Once selected, you can add text, music, stickers, or any other elements you’d like to include to enhance your reel.
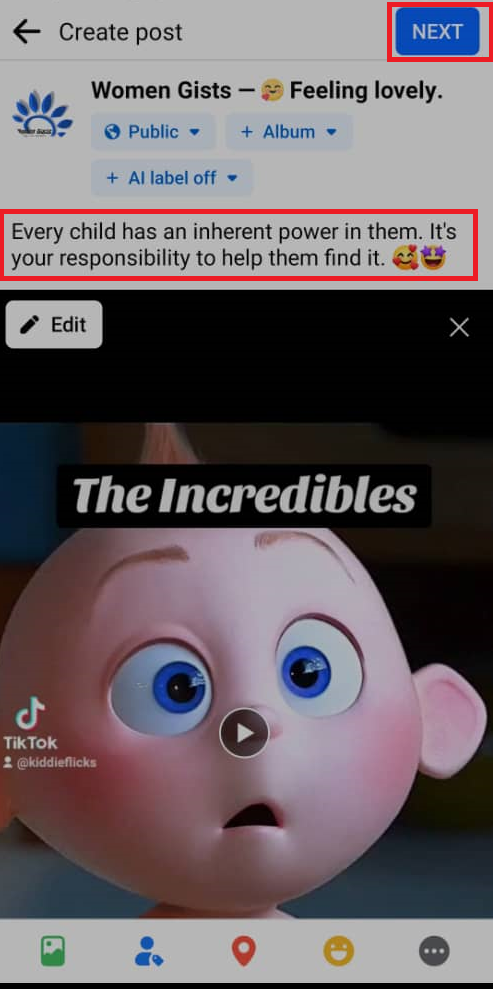
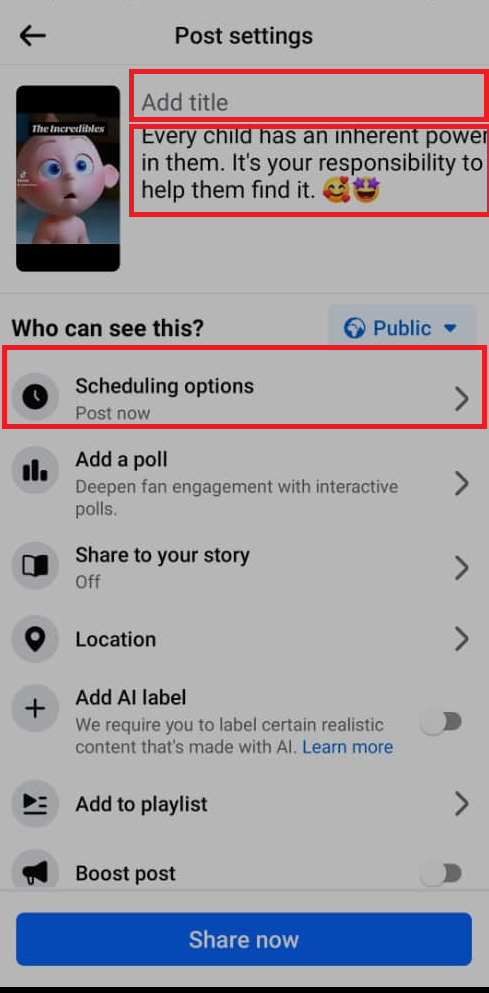
Step 3: Access Post Settings
After you’ve finished editing your reel, tap on ‘Next.’ You’ll be taken to the Post Settings page. Here, look for the option labelled ‘Scheduling’ among the settings.
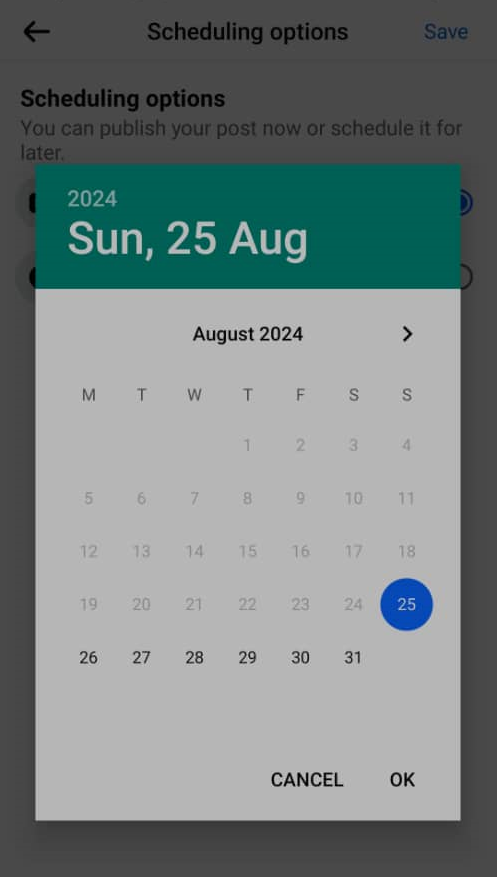
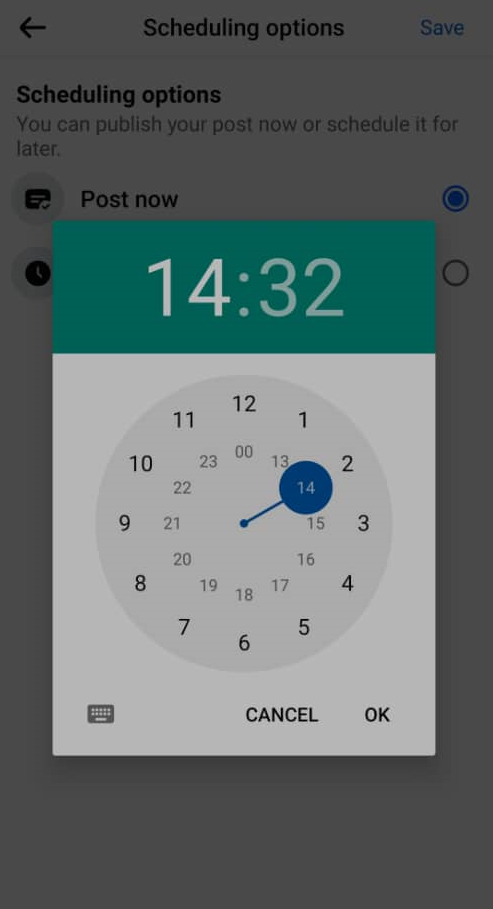
Step 4: Set the Date and Time
Select the date and time you want your reel to be posted. Once you’ve chosen the perfect timing, click ‘OK’ to confirm your selection.
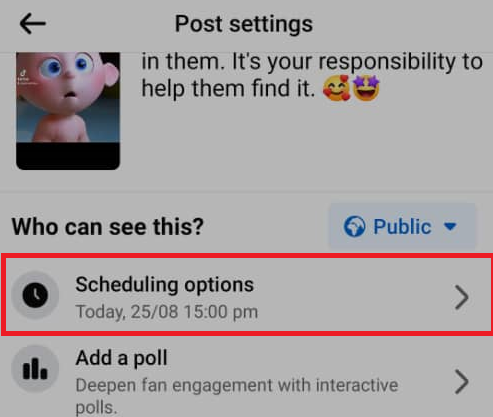
Step 5: Review Your Scheduled Time
You’ll now see the selected date and time displayed under the ‘Schedule for later’ option. This gives you a chance to double-check the timing before finalizing.
Step 6: Schedule Your Reel
Once you’re satisfied with the scheduling details, tap on ‘Schedule’ at the bottom of the page.
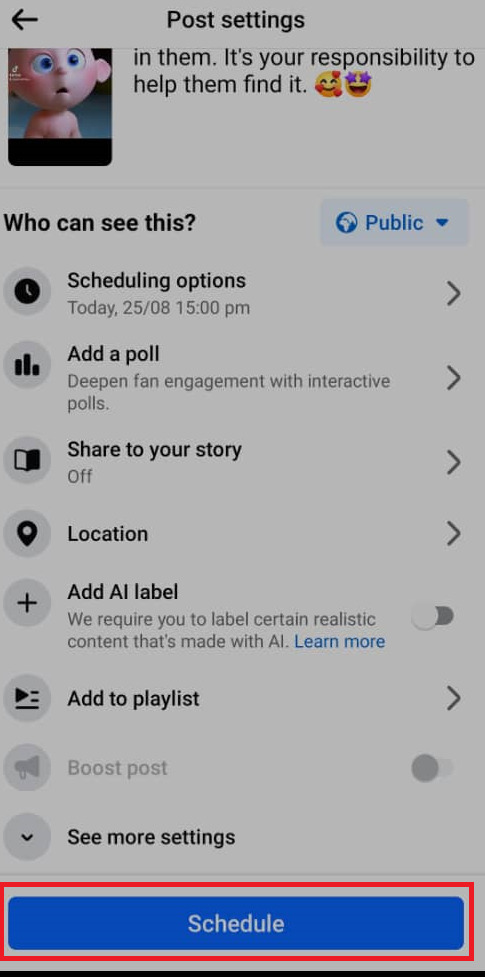
That’s it! Your reel is now scheduled and will automatically be posted at the designated time.
#2: How to Schedule Reels on Facebook with Meta Business Suite
This is another way you can schedule Reels on Facebook – using the Meta Business Suite. The method is also simple and efficient, and you can do it whether from the mobile app or on your computer.
Here, we will be showing you how you can do it step-by-step using the desktop version of the tool.
Step 1: Go to Your Facebook page
Once you’re logged into your Facebook account, navigate to your Facebook page.
To find this, click on your profile picture in the right corner of the page. Now, click on the smaller profile picture at the bottom to go to your page.
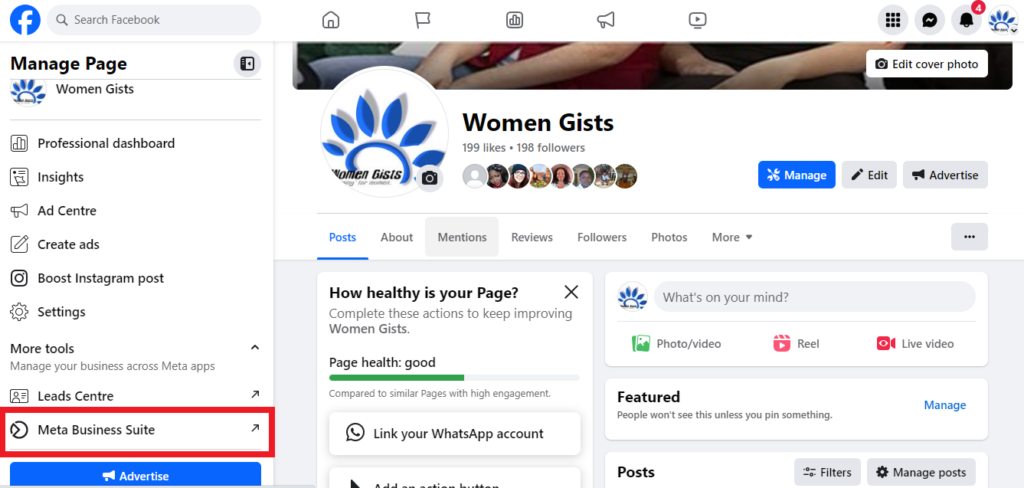
Step 2: Open Meta Business Suite
From your business Facebook page, find the Meta Business Suite button on the left-hand side of the page. Click on it to open the Meta Business Suite page in another tab.
Step 3: Create your Reel
From the Meta Business Suite homepage, click on ‘Create Reel.’ To the left and right on this button are also some other options that allow you to choose whether you would like to create a Post, Ad, or Story.

Now, choose the video or media you want to use for your reel. You can enhance your reel by adding stickers, effects, text, or audio to make it more engaging.
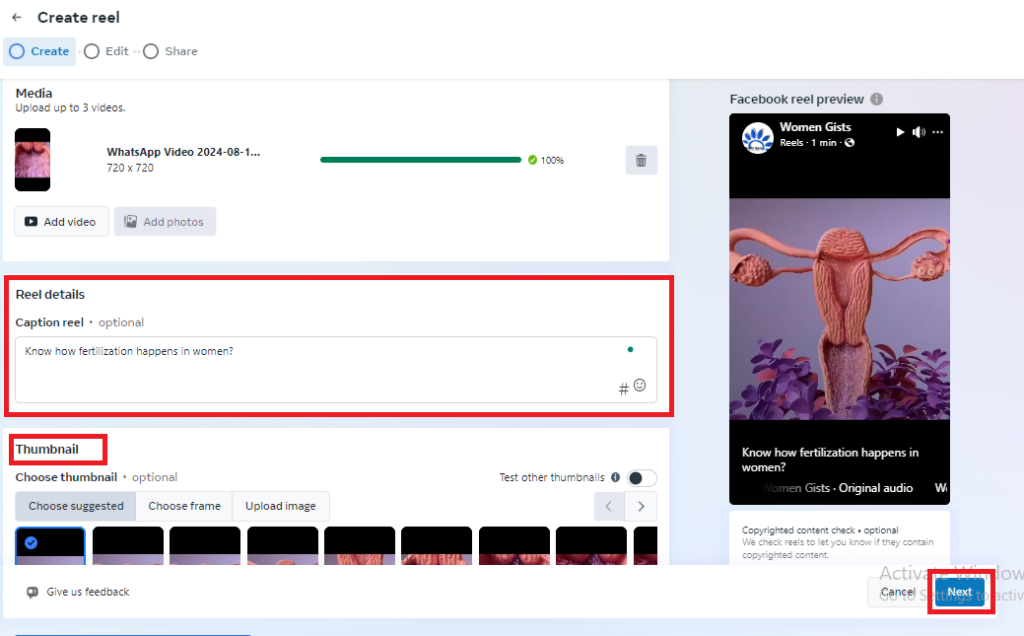
Step 3: Schedule Your Reel
After you’ve finished creating and editing your reel, click on ‘Next.’
A new window will appear with the option to publish now or schedule for later. Select the ‘Schedule’ option.
Choose the date and time you’d like your reel to be posted. On your selected date, the Reel will automatically go live on your Page.
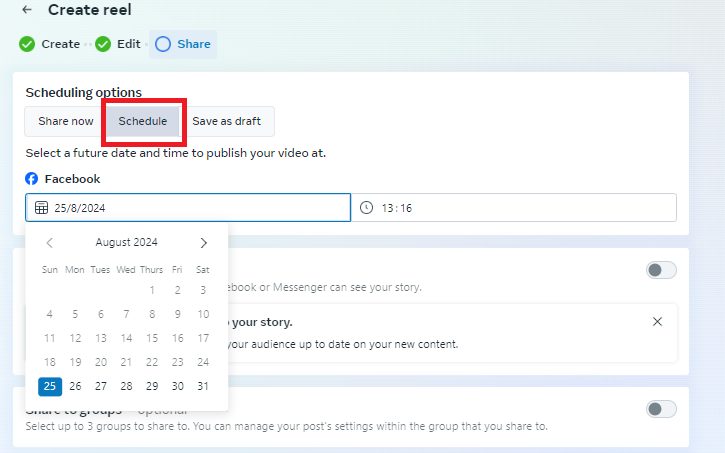
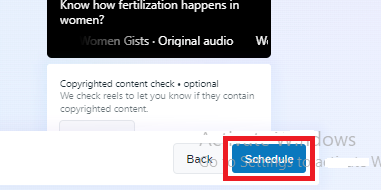
Step 4: Finalize Your Schedule
After setting the time, click on ‘Schedule Reel’ to finalize the process. Your reel is now scheduled and will automatically post at the specified time.
#3: How to Schedule Reels on Facebook Using a Third-Party Tool
While Facebook’s native schedulers are great, using a third-party tool can offer you even more flexibility and functionality.
With features like bulk scheduling and the ability to post across multiple platforms, a tool like OnlySocial makes managing your social media presence easier and more efficient.
Here’s how you can schedule your Facebook Reels using OnlySocial:
Step 1: Connect Your Facebook Page to OnlySocial
Start by logging into your OnlySocial account. If you don’t have an account yet, you can sign up easily.
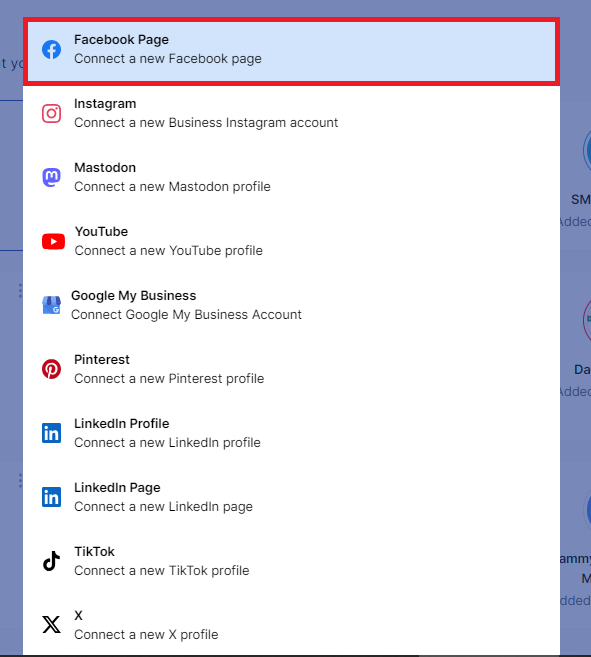
Once logged in, connect your Facebook page to OnlySocial. On your dashboard, click on ‘Accounts’ on the sidebar, then select ‘Facebook Page’ to link your page.
This connection will allow you to manage and schedule your Reels effortlessly.
Step 2: Create Your Reel
After linking your page, click on the ‘Create Post’ button on the top-left corner to start composing your reel.
You’ll be prompted to select the Facebook page(s) where you want the reel to be posted. If you manage multiple pages, you can choose one or several.

Upload the video you want to use for your Reel. And don’t forget to include the caption using the text field on the page.
On the right side of the screen is a preview to show you how your Reel will appear after publication on your Page.
Step 3: Schedule Your Reel
Once your reel is ready, scroll to the bottom of the screen and click on ‘Set Time.’
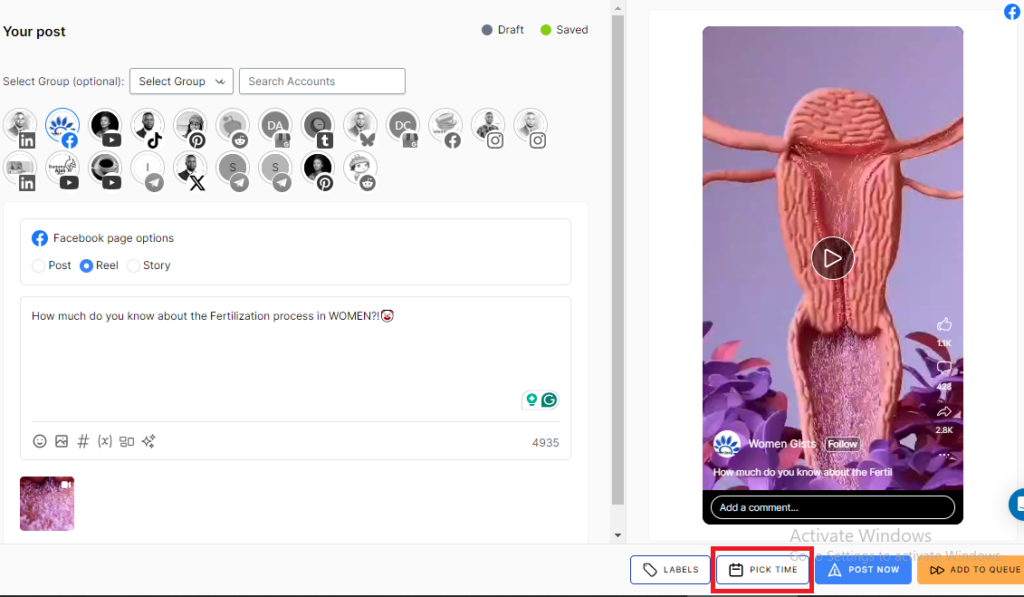
This will bring up a scheduling box where you can choose the exact date and time you want your reel to be published. After setting the schedule, click on the ‘Schedule’ button to confirm.
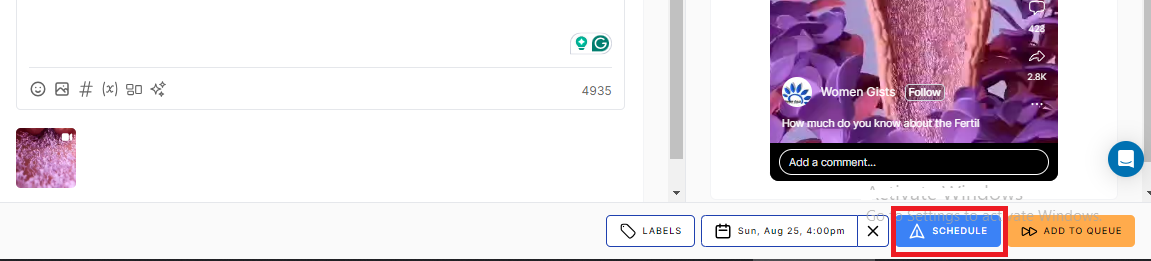
Your Facebook Reel is now set to be posted at the time that will maximize engagement.
You can now see that using OnlySocial not only simplifies the process but also gives you more control over your content strategy. This allows you to focus on growing your brand with minimal hassle.
How to Edit Facebook Reels After Scheduling Them
The question is, ‘Can I edit my Reels after I have scheduled them for a later date?’
The answer is yes. As long as it hasn’t been published yet, you can edit a Facebook Reel even after it’s scheduled.
For each of the scheduling methods we’ve discussed, there’s a way to make changes to your already scheduled posts. Let’s quickly see how you can do that.
How to Edit Scheduled Reels on the Facebook App
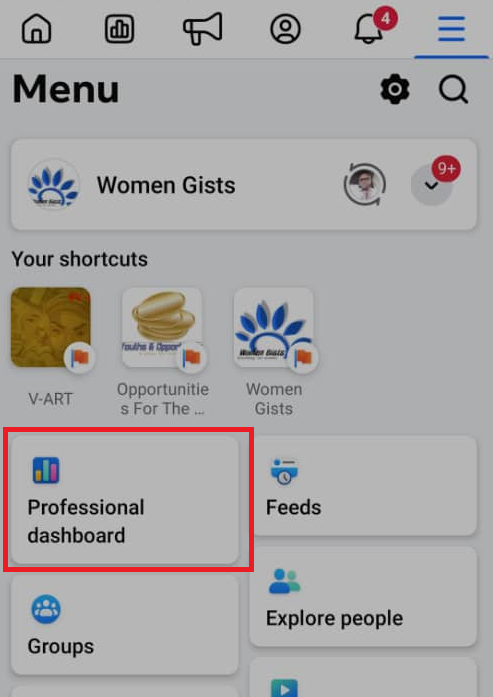
- Open your Facebook app and navigate to your profile.
- Select the ‘Professional Dashboard’ option from the available menu.
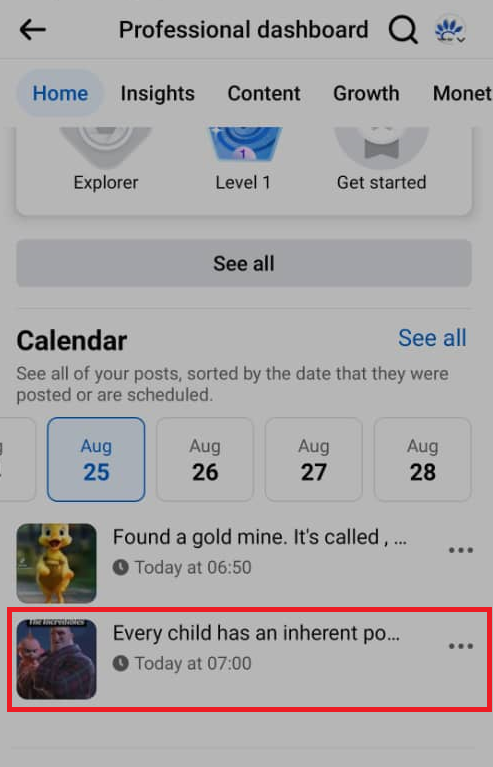
- Scroll down to find the ‘Content Calendar,’ where you’ll see insights for your posts and reels.
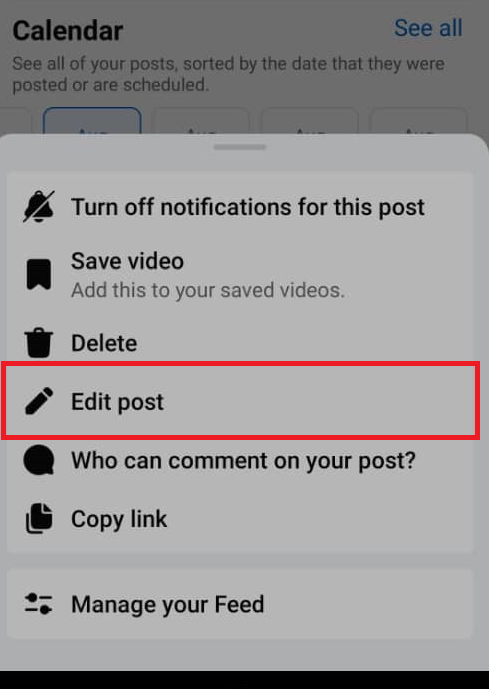
- Locate the date on which you’ve scheduled the reel. The scheduled reel will appear under that date, and next to it, on the right-hand side, you’ll see three vertical dots.
- Click on the three dots to reveal options such as delete, edit, or save the post. Choose ‘Edit’ to make the necessary changes to your scheduled reel.
Below are the screenshots to show you the process:
How to Edit Scheduled Reels on Meta Business Suite
- If you need to make changes to a scheduled post in Meta Business Suite, start by clicking on ‘Planner’ on the left side of the homepage.
- In the Planner, you’ll see all your scheduled posts.
- Find the post you wish to edit and click on it to open the preview page.
- On the preview page, look for the edit option and click on it. Make your changes, then save the post to update the schedule.
How to Edit Scheduled Reels on OnlySocial
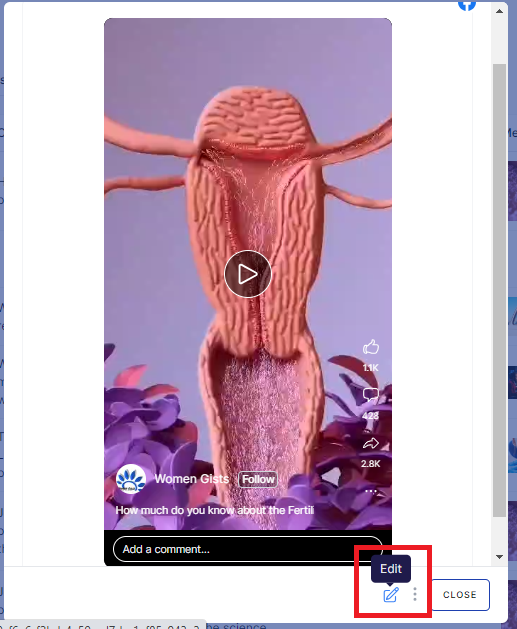
- Editing a scheduled post in OnlySocial is simple. Start by clicking on ‘Posts’ in the sidebar to view all your scheduled posts.
- Locate the post you want to edit and click on it.
- This will open a preview tab of the post. At the bottom of the tab, you’ll find a ‘Pencil icon’—click on it to enter edit mode.
- Make your changes, and once you’re done, click on ‘Schedule’ again to place the updated post back in the queue.

Facebook Reels vs. Instagram Reels: Which Offers the Best Opportunity?
When it comes to short-form video content, both Facebook Reels and Instagram Reels provide unique opportunities for businesses and creators to reach and engage with their audiences.
But which platform offers the best opportunity? Let’s break it down:
Audience Reach
Instagram has long been the go-to platform for visual content, with a strong focus on lifestyle, fashion, and influencer culture. Instagram Reels have the potential to reach a younger, trend-driven audience that’s highly engaged with short, snappy videos.
However, Facebook has a broader user base, including older demographics and a more diverse audience.
Algorithm and Discovery
Instagram’s algorithm is geared toward promoting trending content, giving your Reels a chance to go viral quickly. Facebook, on the other hand, is pushing Reels within its community-driven feed, offering a fresh opportunity to stand out.
Monetization Potential
Both platforms offer monetization opportunities, but the approach differs slightly. Instagram Reels allow creators to leverage their content for brand partnerships and influencer marketing, which can be highly lucrative.
Facebook Reels, however, are integrated into Facebook’s existing monetization tools, such as in-stream ads and Stars, which can be particularly beneficial for creators who already have a strong presence on the platform.
Content Longevity
Instagram is fast-paced, with trends coming and going quickly. This means that while your content might gain rapid traction, it can also fade just as fast.
Facebook, however, tends to have a longer content lifecycle, with Reels potentially staying relevant for a longer period due to Facebook’s broader and more diverse audience.
Integration with Other Features
Instagram Reels are seamlessly integrated with other Instagram features like Stories, IGTV, and Shopping, making it easier to create a cohesive content strategy across different formats.
Facebook Reels, on the other hand, benefit from Facebook’s extensive ecosystem, including integration with Facebook Watch, Groups, and Marketplace, providing multiple avenues for audience engagement.
So, which is best for you?
The best platform for your Reels largely depends on your target audience and content goals. If you’re looking to engage with a younger, trend-focused audience, Instagram Reels might be your best bet.
However, for broader reach and potentially longer-lasting content, Facebook Reels may offer better opportunities.
Ultimately, leveraging both platforms strategically could provide the most comprehensive reach and impact.
Comparing Meta Business Suite and OnlySocial for Reels Scheduling
| Feature | Meta Business Suite | OnlySocial |
| No of Connected Accounts | Limited to Facebook and Instagram accounts | Supports multiple social media platforms |
| Cross Platform Scheduling | Only supports posts to Facebook and Instagram | Allows scheduling across multiple platforms, making it easy to manage your content across platforms seamlessly. |
| Content Calendar | Basic calendar for Facebook | Comprehensive calendar covering all connected platforms |
| Bulk Scheduling | Limited, mostly manual | Supports bulk scheduling for multiple posts |
| Analytics Reporting | Basic insights for Facebook and Instagram | Detailed analytics across all connected platforms |
Meta Business Suite offers a solid solution for managing Facebook and Instagram, but its features are limited to these two platforms.
While it provides basic scheduling, content calendar, and analytics, it’s not as robust when it comes to bulk scheduling or cross-platform management.
OnlySocial, on the other hand, provides a more comprehensive toolset. It supports scheduling across multiple platforms, offers a detailed content calendar, and allows for bulk scheduling.
Additionally, its analytics reporting is more extensive, covering all connected social media accounts. If you’re looking for more flexibility and functionality beyond just Facebook, OnlySocial is the superior choice.
Pro Tips for Scheduling Reels on Facebook
#1: Post at Peak Times
Timing is crucial when it comes to maximizing engagement. Schedule your Reels to go live during peak hours when your audience is most active. This can help increase visibility and interaction with your content.
#2: Leverage Hashtags
Using relevant hashtags can significantly boost the reach of your Reels. Research trending and industry-specific hashtags that align with your content to help your Reels reach a broader audience.
#3: Optimize Video Length
Keep your Reels concise and engaging. Aim for a length that captures attention quickly, typically between 15-30 seconds. This format is more likely to be fully watched and shared by viewers.
#4: Use Captions and Text Overlays
Adding captions or text overlays can make your Reels more accessible and engaging, especially for viewers watching without sound. Highlight key points or add context to your video to enhance its impact.
#5: Plan a Consistent Posting Schedule
Consistency is key to building a loyal audience. Use a content calendar to plan and schedule your Reels regularly. This keeps your audience engaged and coming back for more.
#6: Monitor Performance and Adjust
Regularly check the analytics for your scheduled Reels to see what’s working and what’s not. Use insights to tweak your content strategy, focusing on the types of Reels that generate the most engagement and reach.
Conclusion
Scheduling Reels on Facebook is a powerful strategy for maintaining a consistent and engaging presence on the platform.
Whether you’re using the Facebook app, Meta Business Suite, or a third-party tool like OnlySocial, scheduling allows you to plan ahead, reach your audience at the best times, and free up valuable time for other aspects of your business.
By implementing the tips and methods discussed in this guide, you can streamline your content creation process and maximize the impact of your Facebook Reels.
Start scheduling today and watch your engagement grow!
FAQS
What is the best time to post Reels on Facebook?
The best time is typically during peak hours when your audience is most active. This often includes early mornings between 9 AM and 11 AM, lunchtime around 12 PM to 2 PM, and evenings from 6 PM to 9 PM.
However, it’s important to analyze your own page’s insights to determine when your specific audience is most engaged.
What type of content can I schedule as Facebook Reels?
You can schedule a variety of content as Reels, including short video clips showcasing products, behind-the-scenes footage, educational tips, brand stories, and entertaining content that aligns with your brand. The key is to keep the content engaging, concise, and visually appealing to capture attention quickly.
How far in advance can I schedule my Facebook Reels?
You can schedule your Facebook Reels weeks or even months in advance, depending on the tool you’re using. OnlySocial allows you to plan and schedule Reels well ahead of time, giving you the flexibility to maintain a consistent content calendar.
Will scheduling Reels negatively impact my Facebook reach?
No, scheduling Reels will not in any way affect your reach negatively. In fact, scheduling can help ensure that your Reels are posted at the most optimal times, which can enhance engagement and improve your overall reach. Just stick to consistently posting high-quality content that resonates with your audience.
Can I schedule Reels to multiple Facebook pages at once?
Yes, you can schedule Reels to multiple Facebook pages simultaneously using third-party tools like OnlySocial.
This feature allows you to efficiently manage and distribute content across various pages, ensuring a consistent presence across all your platforms.