How to Schedule Pins on Pinterest – A Complete Guide
How to schedule pins on Pinterest!
Pinterest is a powerful visual platform that can help you showcase your products, services, and ideas to a broad audience.
As a small business owner or content creator, learning how to schedule pins can be a game-changer. It allows you to plan your content in advance, keeping your Pinterest profile active and engaging without constantly needing to be online.
By scheduling pins, you free up valuable time to focus on other important tasks while ensuring your content reaches your audience consistently.
In this guide, we’ll take you through the steps to effectively schedule your pins. Yes, you will see different methods you can use and some tips that will help you schedule pins like a pro.
Let’s get started!
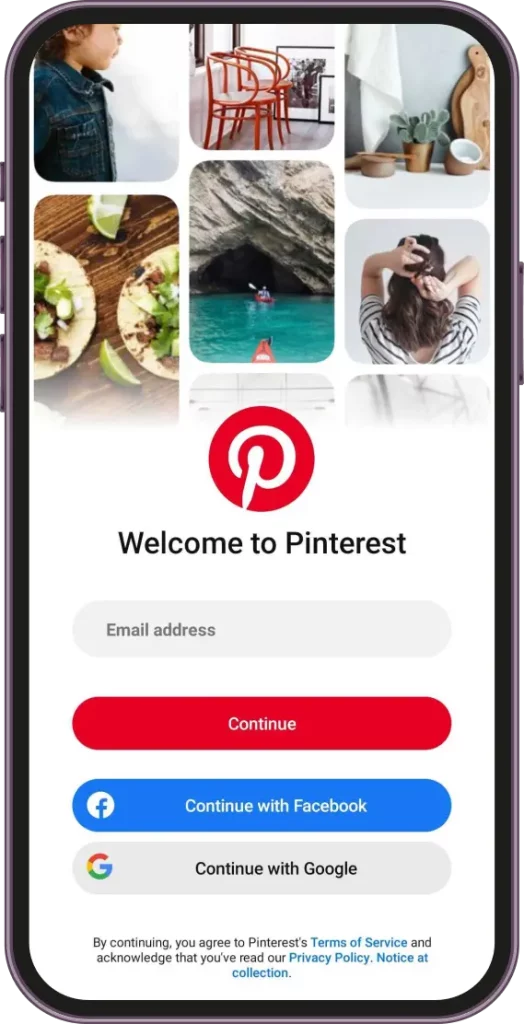
Table of Contents
What You Need to Schedule Pins on Pinterest
To start scheduling pins on Pinterest, there are a few key things you need to have in place.
First, you’ll need to make sure you have a Pinterest Business Account. This is essential for scheduling pins directly within Pinterest.
If you’re currently using a personal account, you will either have to switch to a business account or use a third-party tool to schedule your pins.
Don’t worry; this guide will show you how to use either of the methods.
When the issue of account type has been sorted out, the next thing you will need to pay attention to is the content type.
Why Pinterest allows you to post both images and videos, there is a requirement your media must meet to qualify to be posted on the platform.
These requirements include:
- Video Formats: Videos should be in MP4, M4V, or MOV formats.
- Image Formats: Accepted formats include JPEG, PNG, TIFF, and WEBP.
- Aspect Ratios: Pinterest recommends a 2:3 aspect ratio (about 1000 x 1500 pixels) for vertical pins, though square (1:1) and horizontal (16:9) formats are also supported.
- File Size Limits: Images should be under 20MB, and videos should be kept under 200 MB.
Beyond these technical requirements, it’s also important to focus on creating engaging content.
Craft compelling captions, use relevant hashtags, and ensure your content resonates with your target audience.
Now, that you are well prepared to schedule your pins, let’s see some methods you can employ to make that happen.
How to Schedule Pins on Pinterest – 3 Methods
There are basically three ways to schedule content on Pinterest. You can either use the platform’s native scheduler on desktop, schedule from the mobile app, or use a third-party tool.
Each of these methods comes with its own perks and limitations. Now, let’s explore them one after the other.
#1: How to Schedule Pins on Pinterest Desktop
This is the first method available to you, and it allows you to schedule pins using the Pinterest native scheduler. It is easy and also free.
However, you need to have a business account to be able to use this to schedule your posts.
Also, you can only schedule one post at a time – but up to 10 pins scheduled for the future. We believe this limit is meant to maintain a balance between planned content and spontaneous sharing.
Let’s see the step-by-step guide to scheduling content with this method:
Step 1: Access Business Account
The first thing to do is to log in to your Pinterest Business Account. Remember you can only schedule pins with a business account. The feature is not available for a private account.
So, if you own a private account, you will need to first switch to get started. To switch:
- Click on the drop-down arrow beside your profile image. This is located at the top right corner of the screen.
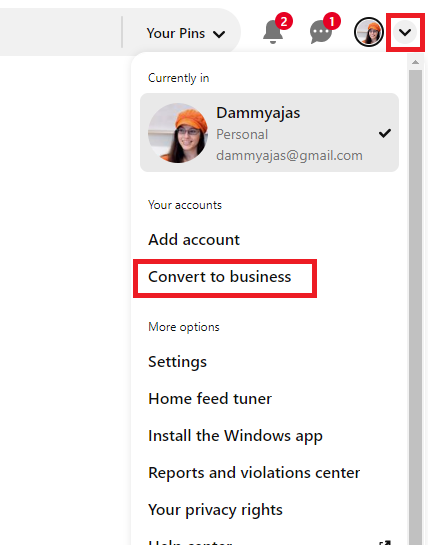
- Now, click on ‘Convert to Business’.
- A new page will open to you, asking if you would like to upgrade your account to a business account. Click on ‘Upgrade’.
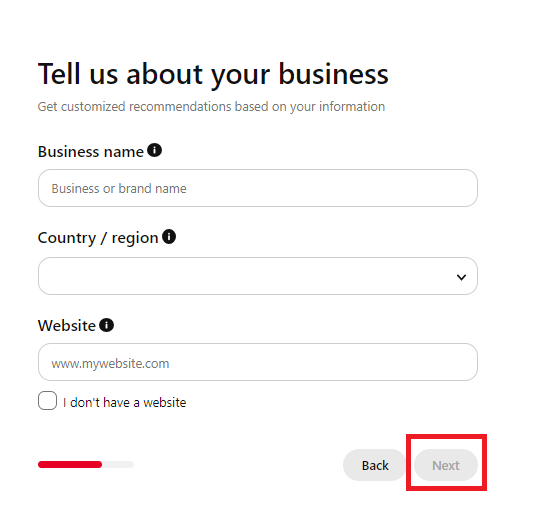
- Next, describe your business, such as the name, what it does, website address, regions, etc.
- After providing these details, click on ‘Next’ to finally switch your Pinterest account to a business account.
Step 2: Create Your Pin
Now, that you have switched to a business account and are eligible to use the feature, the next thing is to create the pin you want to schedule.
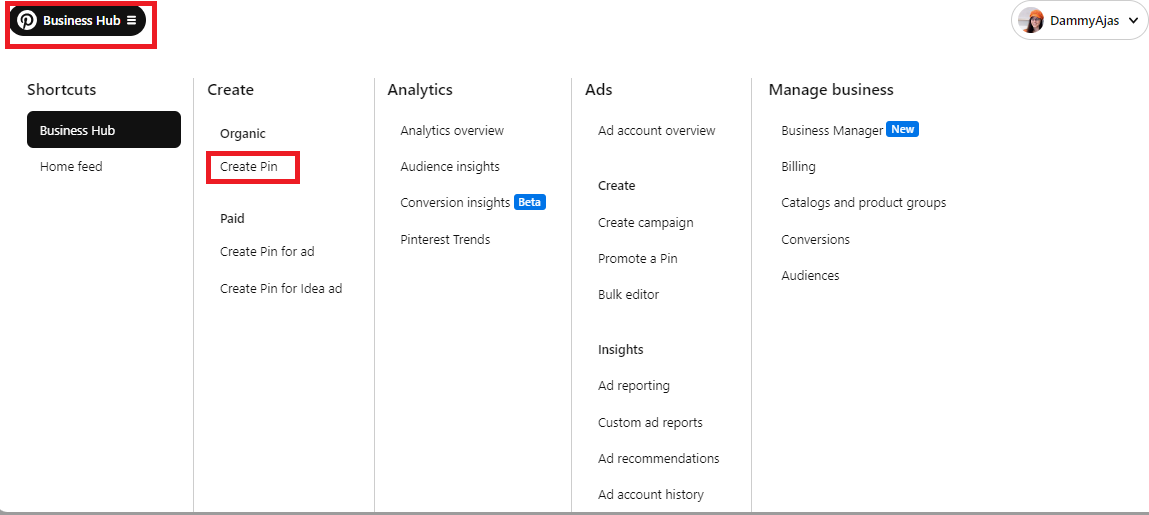
Click on the ‘Business Hub’ button on the top-left corner to begin. In the options that come up, click on ‘Create Pin’.
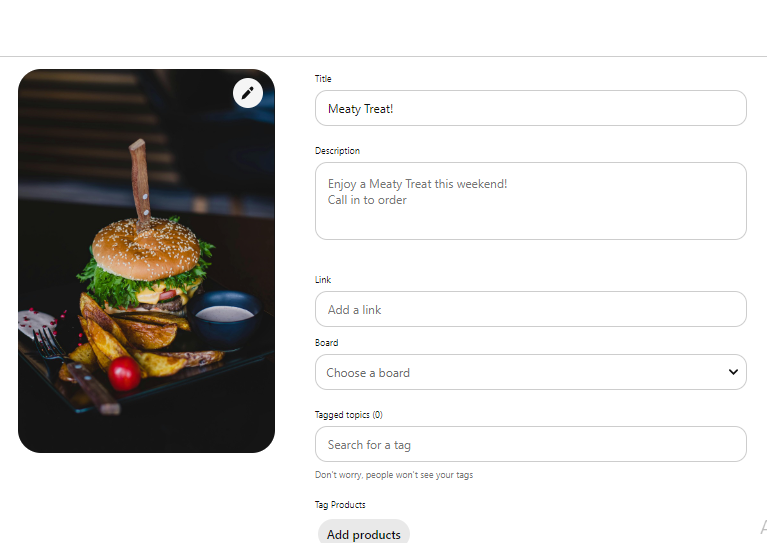
Step 3: Upload Media and Fill the Details
The next thing is to upload your videos or images. Remember to choose great media and then fill in all the details for your Pin. This includes the Pin’s title, an engaging description, a destination link, etc.
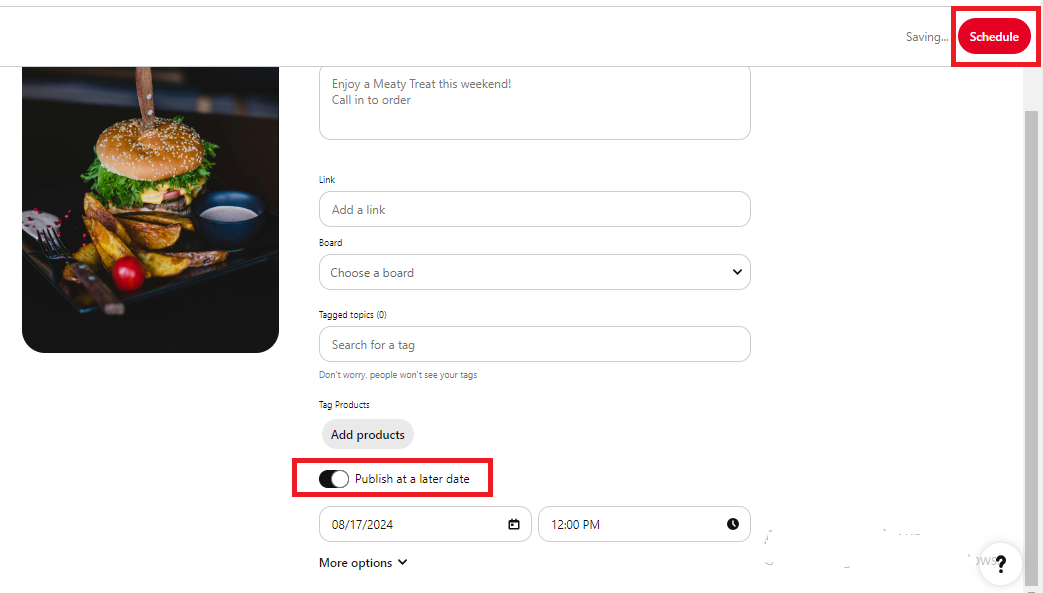
Step 4: Schedule Your Pin
Once you are done, toggle on ‘Publish at a later date’ at the bottom and then select your preferred time and date for the pin to go live. On Pinterest, you can schedule a pin up to 30 days into the future.
Once you’re done setting the time, click on the ‘Schedule’ button at the top-right corner to finish the process.
That’s it! That’s how to schedule pins on Pinterest desktop. Now, let’s go see how you can do this from the mobile app too.
How to Edit a Scheduled Pin on Pinterest?
Perhaps you’re also wondering if it’s possible to schedule a pin after you already scheduled it. Don’t’w worry; after scheduling your pins, you can still make adjustments before they finally go live.
You can edit the title, description, publish date, etc. Just go to your profile. There, you will see your scheduled Pins above all your published Pins.
Click on the three dots at the bottom of the Pin you want to edit, then select Edit.
But what if you want to delete a scheduled Pin?
You just need to follow the same steps as above. But in this case, instead of choosing edit at the end of the process, you would be clicking on ‘Delete’ to delete the Pin.
#2: How to Schedule Pins on Pinterest Mobile
It doesn’t matter where you are, you can still schedule Pinterest Pins and maintain a consistent presence on the platform. Below is how to schedule Pins on Pinterest using the mobile app.
Step 1: Open the Pinterest App
Open the Pinterest app on your mobile device – whether Android or iPhone. Then log in to your business account.
Step 2: Create a New Pin
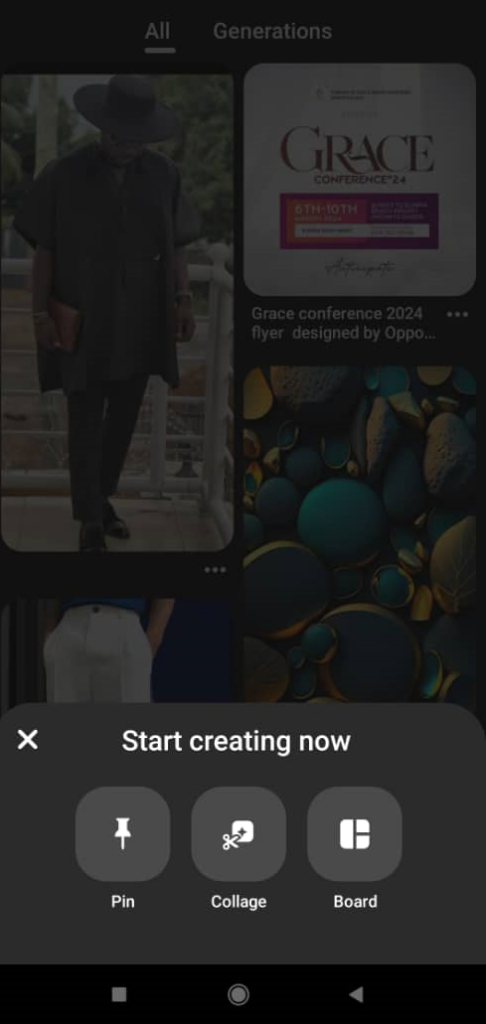
Once logged in, tap on the ‘+’ icon at the bottom and select ‘Pin’ from the options.
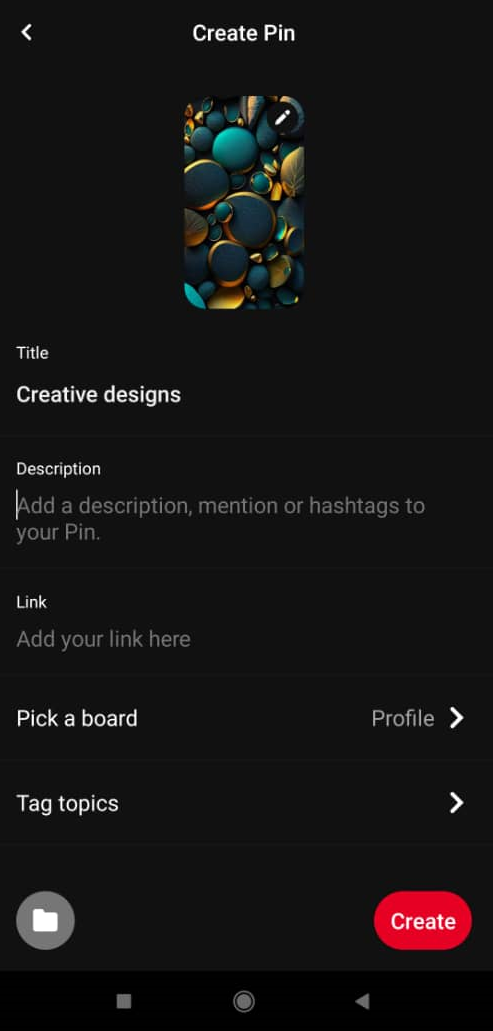
Step 3: Upload your media and add the necessary details
Choose the video or image you want to schedule from your phone’s library. Once uploaded, you can choose to edit the image by tapping on the pencil icon at the top right corner of the image.
Now, add the necessary details to the media. This includes the Pin’s title, description, destination link, etc. Ensure you add engaging details to the Pin to boost its visibility and engagement.
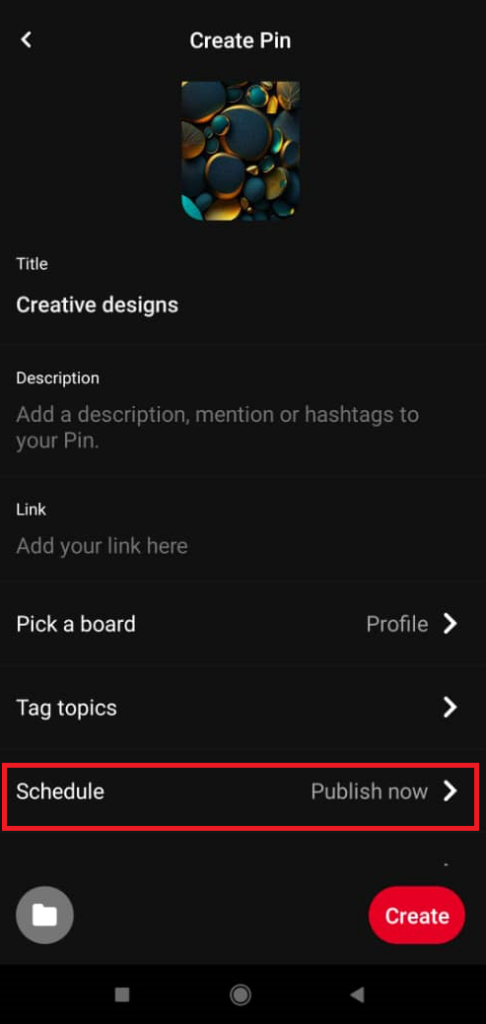
Step 4: Schedule your Pin
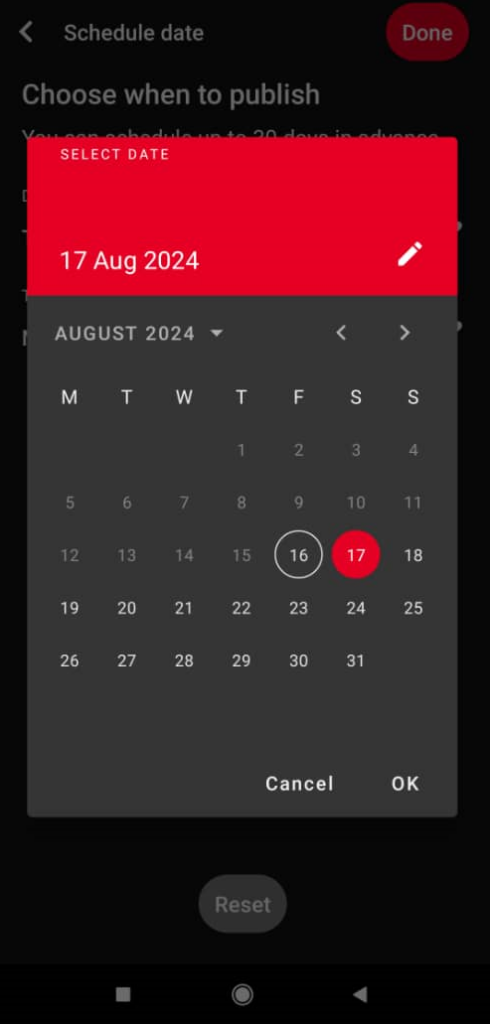
When you’re all set, scroll down to find the ‘Schedule’ button. Tap on it and a calendar will appear. There, choose the time and date you would like your Pin to go live.
Just like on the desktop scheduler, you can schedule your Pin up to 30 days in advance.
Once you have chosen your desired time and date, finally tap on the ‘Schedule’ button at the bottom to schedule your Pinterest Pin.
That’s it. It’s that simple and straightforward – just like with the desktop scheduler. However, there are limitations to these two methods.
Apart from not being able to schedule from a personal profile, you can only schedule up to 30 days in advance. You also cannot schedule more than one Pin at a time.
That is where using a third-party tool comes in handy. A third-party scheduler like OnlySocial offers you more flexibility and convenience when it comes to scheduling Pinterest Pins.
Now, let’s see how you can use that too.
#3: How to Schedule Pins on Pinterest Using OnlySocial
OnlySocial is a popular social media scheduling tool that has become popular among business ownwers and content creators.
It is a one-stop social media management tool designed to streamline how you manage your content across all social media platforms, including Pinterest.
Here are the steps to schedule Pinterest Pins using OnlySocial:
Step 1: Login and Add Your Pinterest Account
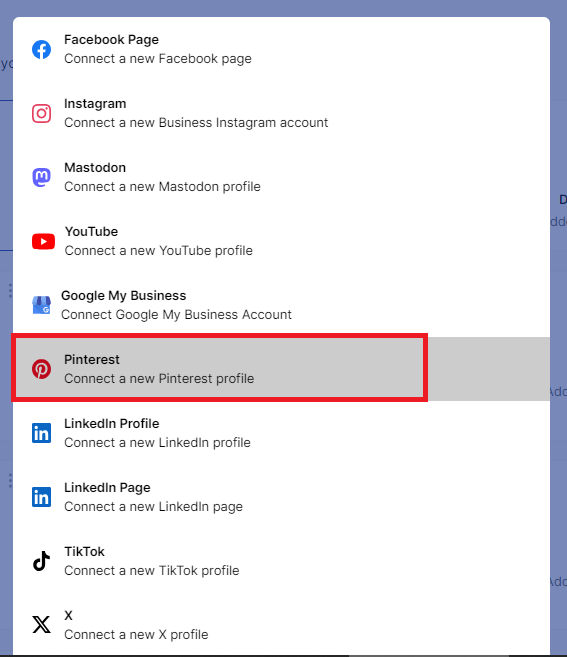
First, log in to your OnlySocial account to add your Pinterest profile. If you don’t have an account yet, quickly register for one now.
Upon logging in, you’ll be directed to the dashboard, where you can perform all your scheduling activities. Now, click on the ‘Account’ button on the sidebar to add your Pinterest profile.
Step 2: Create your Post
In the dashboard, click on ‘Create Post’ in the top left corner to create your Pin.
Now, choose the Pinterest account you want to schedule. If you have multiple Pinterest accounts added to OnlySocial, you can select more than one account to simultaneously schedule to.
The next thing is to upload your video or image using the media icon at the bottom of the text field.
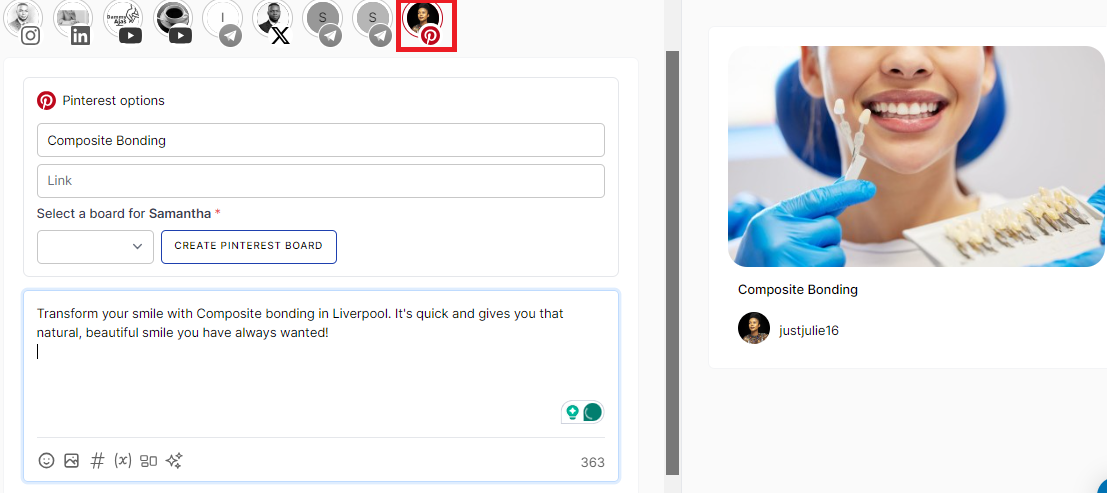
Step 3: Fill Out All Details
After uploading the image or video, fill in all the relevant details, including the Pin’s title and description, to optimize your Pin for search and increase viewer engagement.
Remember to include relevant keywords in your description and encourage viewers to visit your website by adding a destination link.
Step 4: Schedule your Pin
Once your Pin is created with all details complete, the final step is to schedule it.
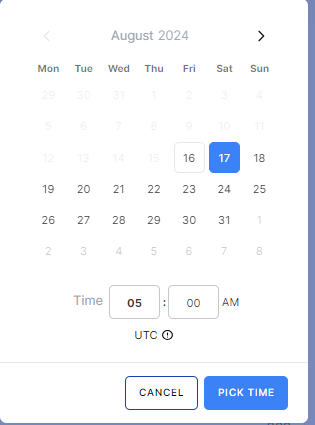
OnlySocial’s scheduling tool allows you to pick the exact date and time for your Pin to be posted on Pinterest.
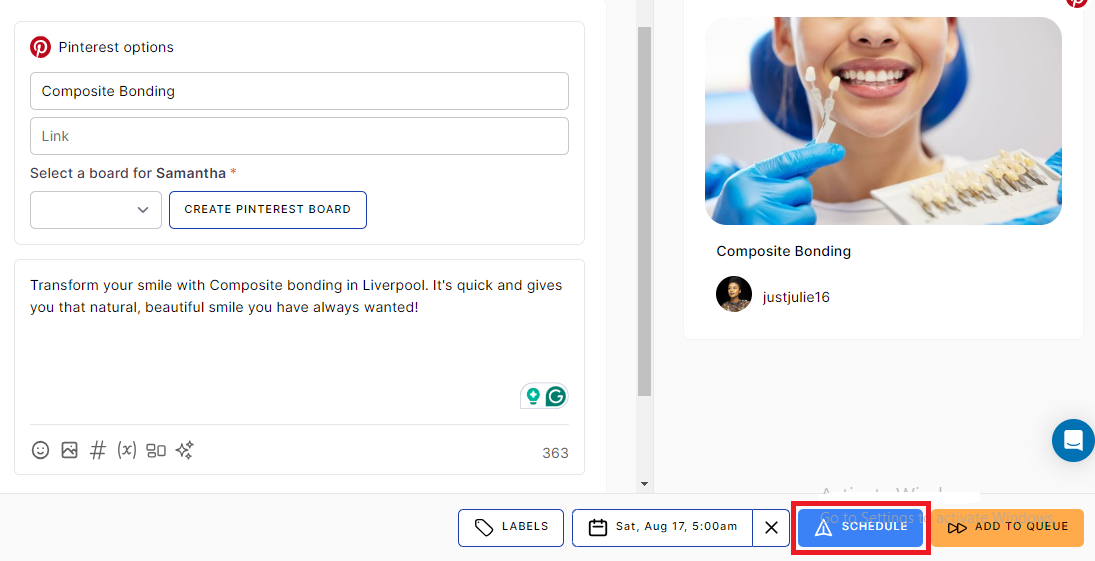
So, click on ‘Pick Time’ at the bottom right corner of the screen. Then select the time and date you would like your Pin to go live.

Once the date is set, finally click on ‘Schedule’ to finish scheduling your Pin.
Benefits of OnlySocial
Using OnlySocial to schedule your Pinterest pins offers a range of powerful features that go beyond basic scheduling. Here’s what you can enjoy with the tool:
Bulk Scheduling
OnlySocial allows you to schedule multiple pins at once, saving you time and effort.
This bulk scheduling feature is perfect for planning content ahead of time, ensuring your Pinterest profile stays active and engaging without the need for constant manual posting.
Supports Multiple Platforms
With OnlySocial, you’re not limited to just Pinterest. The tool supports scheduling across multiple social media platforms, including Facebook, Instagram, TikTok, Twitter, LinkedIn, and more.
This makes it easier to manage all your social media content from a single, convenient dashboard.
User-Friendly Interface
The tool is designed with simplicity in mind. Its intuitive and easy-to-navigate interface makes it accessible for users of all levels, whether you’re a social media novice or a seasoned marketer. Everything you need to manage your content is just a few clicks away.
Multi-Account Management
If you manage more than one Pinterest account – or accounts on other social platforms – OnlySocial has you covered.
The tool allows you to manage and schedule content for multiple accounts from one place. That’s really a great way to streamline your workflow and keep everything organized.
Content Calendar
The content calendar feature in OnlySocial gives you a clear, visual overview of all your scheduled posts across different platforms. This helps you plan your content strategy effectively.
Analytics
OnlySocial doesn’t just help you schedule your content; it also provides valuable analytics to track the performance of your pins and posts.
With these insights, you can refine your strategy, improve engagement, and achieve better results across all your social media channels.
Pro Tips for Scheduling Pins on Pinterest
#1: Pin at Optimal Times
To maximize the visibility of your pins, it’s important to schedule them at times when your audience is most active.
Use Pinterest Analytics or tools like OnlySocial to identify peak engagement times for your target audience.
Typically, evenings and weekends are when users are most active on Pinterest, but your specific audience may have unique patterns.
When you schedule your pins during these peak times, you increase the chances of your content being seen and interacted with.
#2: Create High-Quality Visuals
Pinterest is a highly visual platform, so the quality of your images and videos plays a crucial role in attracting attention.
Ensure that your pins are visually appealing, with clear, high-resolution images that align with Pinterest’s recommended aspect ratios.
Use vibrant colors, readable text overlays, and compelling designs to make your pins stand out in the feed. Remember, eye-catching visuals are more likely to be saved and shared, extending the reach of your content.
#3: Diversify Your Content
Don’t just stick to one type of content – mix things up to keep your audience engaged.
Combine a variety of content types, such as product images, infographics, how-to guides, and videos, to cater to different interests and needs.
That way, you’ll appeal to a broader audience and increase the likelihood of your pins being saved and shared.
#4: Use Keywords and Hashtags Effectively
Pinterest functions as a search engine, so optimizing your pins with relevant keywords and hashtags is essential for discoverability.
When scheduling your pins, make sure to include descriptive keywords in your pin titles, descriptions, and hashtags that align with what your target audience is searching for.
This will help your content appear in search results and related pin feeds, driving more traffic to your boards and increasing engagement.
#5: Consistently Post to Active Boards
Active boards with a good following are key to driving engagement on Pinterest. When scheduling your pins, prioritize posting to your most active and relevant boards.
These are the boards where your audience is most likely to engage with your content. Regularly update these boards with fresh pins to keep them active and maintain your audience’s interest.
#6: Monitor Performance and Adjust
Scheduling pins is not a set-it-and-forget-it strategy. Regularly monitor the performance of your scheduled pins using the analytics tools provided by OnlySocial.
Keep an eye on metrics such as repins, clicks, and impressions to see what’s working and what isn’t. Use this data to make informed adjustments to your content and scheduling strategy.
For example, if you notice certain types of pins or times of day performing better, adjust your future schedules to capitalize on these insights.

Common Pitfalls and How to Avoid Them
When scheduling pins on Pinterest, it’s easy to fall into certain traps that can undermine your efforts.
So, now that you know how to schedule Pins on Pinterest, you should also know about some pitfalls you should avoid.
- Over-Scheduling Without Engagement
While scheduling pins can save time, it’s important not to overlook the need for real-time engagement.
If you only schedule content and never interact with your audience, you might miss out on building a loyal following.
To avoid this, make time to engage with your audience by responding to comments, repinning relevant content, and participating in Pinterest communities.
- Ignoring Analytics
Failing to monitor the performance of your scheduled pins is a common mistake. Without tracking metrics like impressions, clicks, and repins, you won’t know what’s working or where you need to improve.
Regularly review your Pinterest Analytics to understand which pins resonate with your audience and adjust your strategy accordingly.
- Repetitive Content
Posting the same type of content repeatedly can lead to audience fatigue and lower engagement.
It’s important to diversify your pins by mixing up the types of content you post, such as product images, infographics, and inspirational quotes.
This keeps your boards fresh and interesting, encouraging users to engage with your content.
- Neglecting Pin Quality
Quality matters on Pinterest. Posting low-quality images or poorly designed pins can harm your brand’s credibility and reduce the effectiveness of your content.
So, always ensure your pins are visually appealing, high-resolution, and well-designed. Invest time in creating quality visuals that stand out in the Pinterest feed and reflect your brand’s professionalism.
Pins on Pinterest Not Showing Up
You’ve put in the effort to create and schedule your pins, but they’re nowhere to be found on Pinterest. Here are a few common reasons why your pins might not be showing up and what you can do about it:
- Visibility Settings
One of the most common issues is related to your pin’s visibility settings. If your pin is set to “secret,” it will only be visible to you and anyone you specifically share it with.
So, double-check the settings to make sure your pin is set to “public” so it can be seen by everyone.
- Board Relevance
Pins should be relevant to the board they’re saved to. If your pin doesn’t align with the board’s theme, it might not appear in the board feed as expected.
- Keyword Optimization
Pins that aren’t optimized with relevant keywords in their title and description may struggle to show up in search results. Research popular keywords related to your content and incorporate them naturally to improve your pin’s visibility.
- Community Guidelines
If your pin violates Pinterest’s Community Guidelines, it might be removed or hidden. Check your email for any notifications from Pinterest regarding content removal.
Make sure to review Pinterest’s guidelines and ensure that your content complies to avoid future issues.
- Spammy Content
Pinterest favors informative and valuable content over overly promotional or repetitive posts. Avoid using excessive promotional language or duplicating content, as this can reduce your pin’s reach.
- Technical Issues
Sometimes, technical glitches on Pinterest’s end can cause your pins to not display correctly.
If you suspect this might be the case, try refreshing the page, logging out and back into your account, or even clearing your browser cache to resolve the issue.
FAQs
Can I schedule Pins directly on Pinterest?
Yes, you can schedule your Pinterest Pins directly on the platform, but this feature is available only for Business Accounts. Personal accounts will need to use third-party tools to schedule pins.
How many pins can you schedule on Pinterest?
Pinterest allows you to schedule up to 100 pins at a time using their native scheduler.
How often should you post on Pinterest?
It’s recommended to post at least once a day on Pinterest to maintain consistency and keep your audience engaged. However, more frequent posting, such as 5-10 pins per day, can further enhance your visibility.
Can I schedule video pins?
Yes, you can schedule video pins on Pinterest, either through the native scheduler for Business Accounts or using third-party scheduling tools.
Can I schedule Pins to multiple Pinterest accounts at once?
Yes, with third-party tools like OnlySocial, you can schedule pins to multiple Pinterest accounts simultaneously, making it easier to manage content across different profiles.
Can I edit already scheduled Pins?
Yes, you can edit pins that have been scheduled, either through Pinterest’s native scheduler or a third-party tool. Simply go into your scheduled pins and make the necessary changes before they are published.