How to Set Custom Thumbnails for all Social Platforms at Once
Your video thumbnail is like a shop window display – if it’s dull, people will walk right by, no matter how fantastic what’s inside is.
Having a good custom thumbnail signals to viewers that your video is worth checking out, hence helping to boost your views and give your content that extra spark to stand out in a crowded feed.
But here’s the catch: each social platform has its own upload process, image size requirements, and peculiarity.
Uploading a custom thumbnail to YouTube is one click, but doing the same on Twitter, LinkedIn, and TikTok means hopping between apps, resizing images, and hoping nothing looks off.
What if you could skip all that hassle and set a custom thumbnail for every platform at once?
In this guide, we’ll walk you through exactly how to do just that, so you can spend less time wrestling with settings and more time creating great videos.
Read on to see how you can set custom thumbnails for all your social profiles at once.
Table of Contents
But Why Care About Custom Thumbnails?
Your thumbnail is the first thing people see – and first impressions matter.
Studies show that videos with custom thumbnails get up to 154% more views than those using automatic grabs. A well-designed image not only signals professionalism but also makes your content pop in busy feeds.
Custom thumbnails let you control the story you’re telling before a viewer even clicks “Play.”
You can highlight key moments, showcase faces, or overlay text that teases your video’s main benefit. That extra clarity helps viewers decide in a split second whether your video is worth their time.
Furthermore, consistent, on-brand thumbnails build recognizability.
When your audience spots your unique style – color palette, logo placement, or typography – they’re more likely to pause, click, and keep coming back for more.
How to Set Custom Thumbnails for All Social Platforms – Step By Step
Having a standout custom thumbnail is fantastic, but trying to upload the perfect image to YouTube, then resize it for Facebook, then wrestle with Twitter’s interface… it can feel like juggling too many balls and lead you to skip thumbnails altogether.
Really, you’re not alone. Many creators give up on custom images simply because it’s too time-consuming.
But here, we’ll show you how to use OnlySocial to upload one polished image and have it automatically applied across YouTube, Facebook, Twitter, LinkedIn, and more.
No resizing, no switching tabs – just one easy process that ensures your video looks its best across all your social profiles.
Here’s how to set your custom thumbnail across every platform in just a few clicks:
- Log in to your OnlySocial account. Once you hit your dashboard, you’re ready to roll.
- Click on ‘Create Post’ on the sidebar to begin creating your post.
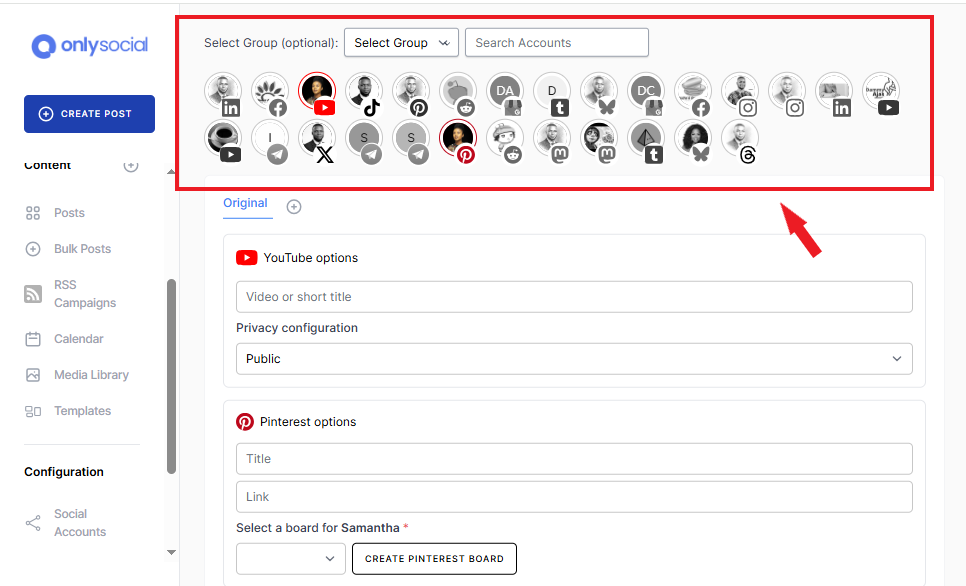
- Now, choose the social profiles you want to publish to (YouTube, Facebook, TikTok, Twitter, LinkedIn, etc.).
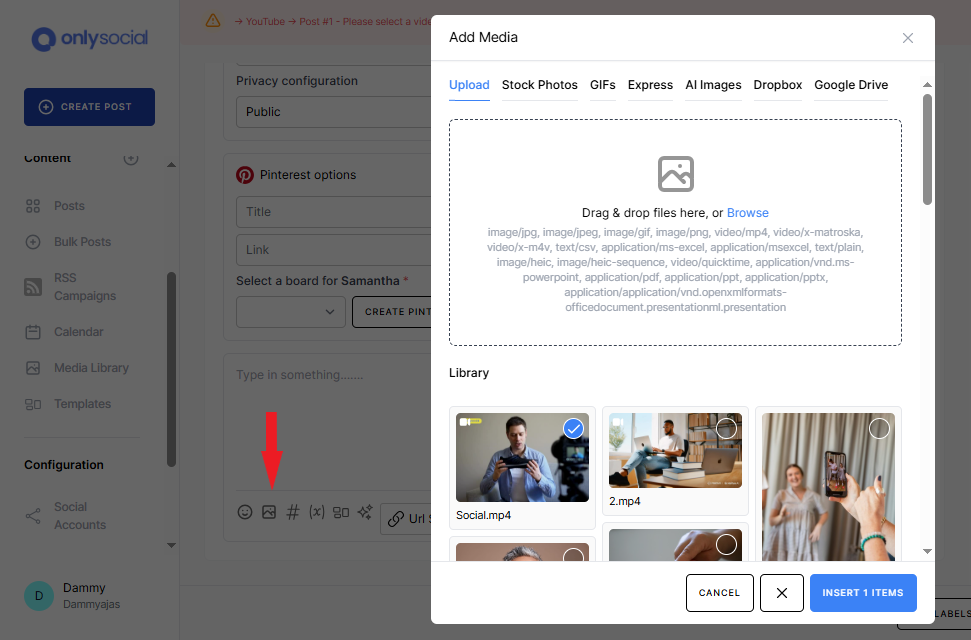
- In the composer, click on the media icon and choose the video you’re sharing.
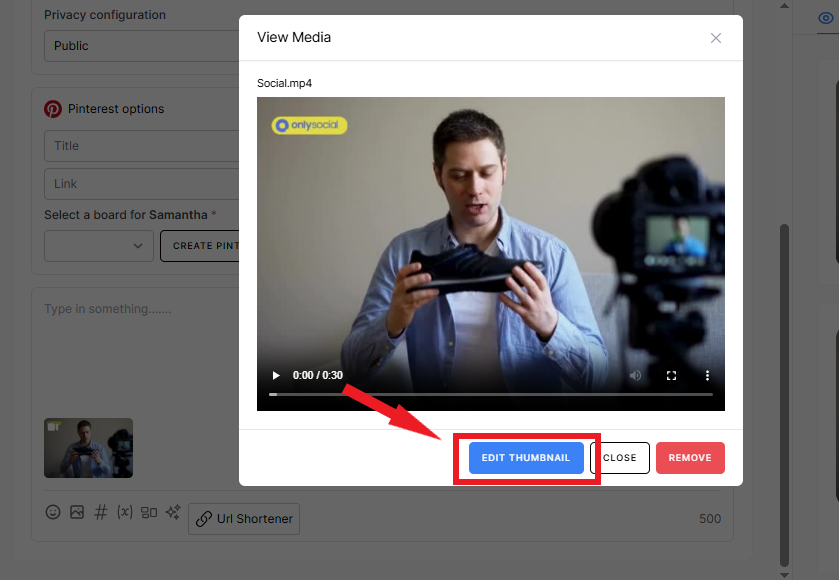
- Now, click on the uploaded video

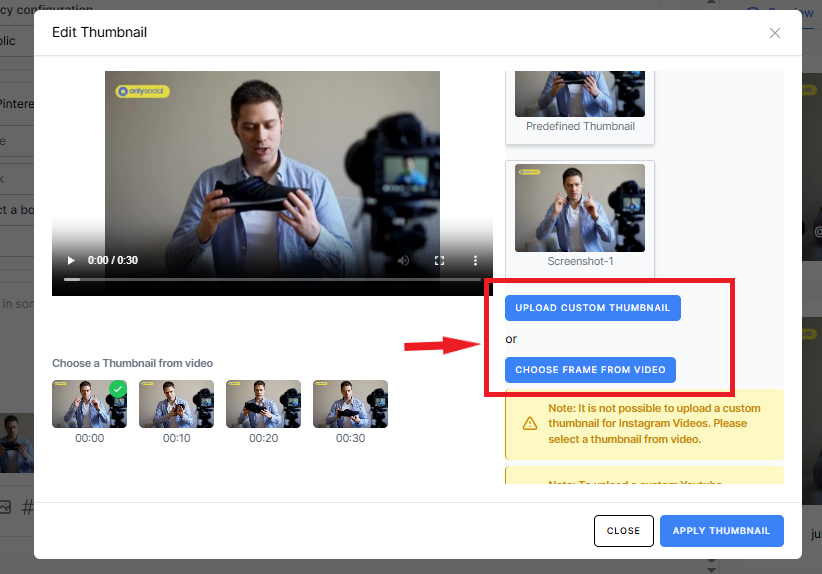
- Click on “Edit Thumbnail.” This opens the custom thumbnail tool. Now, select if you want to upload an image as the custom thumbnail, or select from the video frame
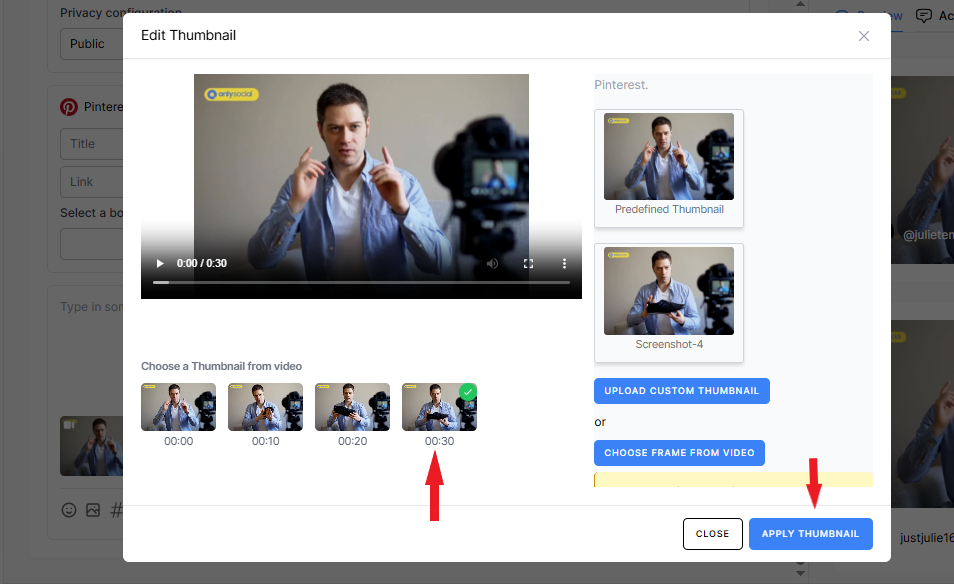
- After selecting your option, click on the APPLY THUMBNAIL button. Then CLOSE
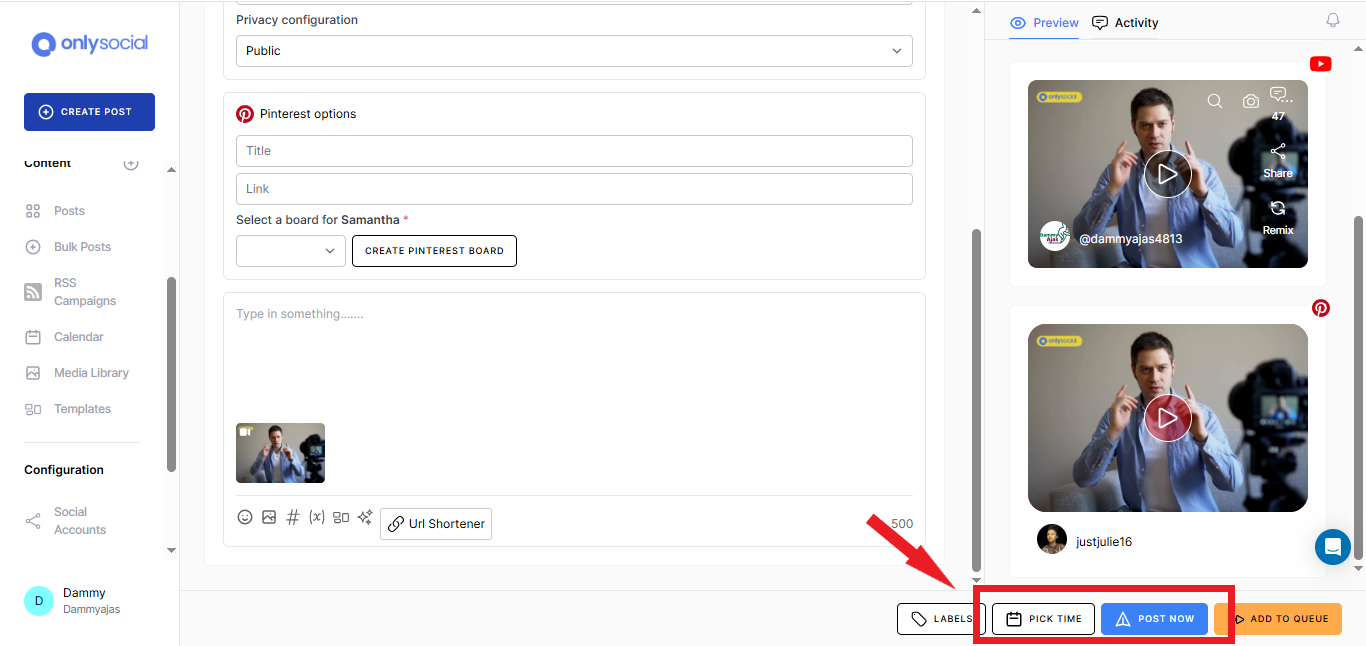
- You’ll see that your post preview will now display the new cover image selected/uploaded.
- Finish your post by adding captions and hashtags, and setting your schedule or publishing time.
- Click Publish to let your video go live now, or Schedule to pick the perfect moment for maximum impact.
And that’s it. Your video will now be published with the chosen thumbnail for all the social platforms you have selected.
What Social Media Platforms Support Custom Thumbnails?
Not every platform lets you pick your own thumbnail, but plenty do – and those are the ones you’ll want to prioritize when you’re aiming for maximum impact.
Here’s where you can upload or select a custom cover image for your videos:
- YouTube (account must be phone-verified first)
- Mastodon
- Telegram
On platforms that don’t yet support true custom thumbnails, like Facebook link posts, Threads, and X (formerly Twitter), you’ll still get an auto-generated preview when you paste a link.
And while TikTok doesn’t let you upload a thumbnail from your desktop, you can still select the perfect frame right in the app.
Can I change my video thumbnail after scheduling a post?
Absolutely. If you’ve scheduled a video and then decide your thumbnail could be stronger, you don’t need to start from scratch.
In OnlySocial, simply find the scheduled draft in your calendar, open the post editor, and click on the thumbnail area to swap in a new image or pick a different frame.
Once you hit Apply Thumbnail and save, OnlySocial updates the preview for every linked platform – no need to delete or re-schedule.
Keep in mind that some networks lock in metadata once a post goes live. So if you’ve already published, it’s best to change your thumbnail before the scheduled time. That way, your viewers always see the latest, most eye-catching cover you’ve chosen.
Common Mistakes to Avoid When Adding Custom Thumbnails
Before you dive into custom thumbnails, it helps to know what can trip you up. A few simple missteps can turn a click-worthy cover into a missed opportunity.
So, before we round up this post, let’s take a quick look at some of the most common thumbnail blunders and how to avoid them.
1. Using low-resolution images
A blurry or pixelated thumbnail looks unprofessional and can actually deter clicks. So, when going for a custom thumbnail, always use high-res images (at least 1280×720px for YouTube, 1080×1080px for Instagram) so your thumbnail stays crisp on every device.
2. Ignoring aspect ratios
Each platform has its ideal dimensions. Uploading a 16:9 thumbnail to Instagram (which favors 1:1 or 4:5) will result in awkward cropping. Double-check the specs in the preview panel before you hit “Publish.”
3. Overcrowding with text
Thumbnails overloaded with words can look cluttered, especially on small mobile screens. Stick to a short, punchy headline or a couple of well-placed keywords, and let your visuals do most of the talking.
4. Skipping YouTube verification
YouTube requires account verification (via phone) before custom thumbnails are allowed. If you try to schedule a YouTube post without verifying first, your thumbnail won’t upload.
Take two minutes to verify, and you’ll avoid that frustrating roadblock. Here’s how to verify your account.
Final Note
You no longer have to endure the stress of hopping between platforms and wrestling with uploading the perfect thumbnails for all your socials at once. OnlySocial has your back.
We’ve walked through each step of setting a custom thumbnail across multiple platforms, all in one smooth workflow.
Next time you publish a video, you’ll breeze through thumbnail selection and get straight to the good stuff, which is sharing your best content with a cover image that truly pops.
If you haven’t registered for an account with OnlySocial yet, now is the best time. Many goodies are awaiting you!