How to Go Live on Facebook: A Comprehensive 2025 Tutorial
Welcome to 2025, where the digital world is more entwined with our daily lives than ever before. One tool, in particular, has remained a powerhouse in facilitating online connections – Facebook Live. If you’re here today, it’s because you recognize that getting to grips with Facebook Live will empower you to communicate in real-time with your audience, no matter whether you’re a budding influencer, a growing small business, or a well-established brand. This is where our comprehensive guide on “How to Go Live on Facebook: A Comprehensive 2025 Tutorial” steps in to help.
Table of Contents
- 1 Preparing for Your Facebook Live
- 2 Going Live on Facebook
- 3 After Your Facebook Live
- 4 Wrapping Up
- 5 BONUS
- 6 Frequently Asked Questions
- 6.1 Do I need a professional camera to go live on Facebook?
- 6.2 Can I go live on Facebook from a desktop or laptop device?
- 6.3 How long can my Facebook Live video be?
- 6.4 Who can see my Facebook Live video?
- 6.5 Can I schedule a Facebook Live video in advance?
- 6.6 Can I block specific viewers from watching my live video?
- 6.7 Can I download the video after my Facebook Live has ended?
- 6.8 Can I edit my Facebook Live video after the broadcast has ended?
- 6.9 Will my viewers be notified when I go live?
Why Facebook Live?
Before we dive into the intricacies of broadcasting live, it’s important to understand why this tool packs such a punch in the constantly evolving digital landscape. In the age where engagements, interactions, and real-time responses hold great value, Facebook Live stands tall as an engaging and interactive platform.
Interactive features like real-time comments, reactions, and viewer counts make the experience immersive for both broadcaster and viewer, bridging the gap that often exists in digital communication. Broadcasting live offers a sense of immediacy and authenticity that pre-recorded content can’t compete with.
Embrace the Future with Facebook Live
The future is digital, and one could argue it’s live, too. Embracing Facebook Live as a part of your online strategy or personal brand in 2025 could be the key to unlocking a deeper connection with your online audience and adding a new layer to your digital presence.
With this tutorial, we aim to equip you with the know-how of Facebook Live, offering step-by-step instructions and tips to make your live streaming experience smoother and more engaging.
Stay tuned as we delve into everything you need to know about going live on Facebook, from preparation execution to post-broadcast actions. Let’s start this exciting journey to broadcast, engage, and interact on one of the world’s favorite social platforms. It’s time to power up your real-time connection with “How to Go Live on Facebook: A Comprehensive 2025 Tutorial.”
Preparing for Your Facebook Live
Taking the plunge to go live on Facebook may seem daunting. However, as with any meaningful endeavor, a little bit of preparation goes a long way. In this section of our “How to Go Live on Facebook: A Comprehensive 2025 Tutorial,” we’ll go over essential tools, tips, and best practices to put you on the path to success. Let’s lay the groundwork for your first Facebook Live stream.
Essential Tools and Equipment: Getting Started the Right Way
Before you go live, it’s crucial to set up the right tools and equipment. While at its core, Facebook Live only requires a smartphone, camera, and internet connection, there are ways to elevate your broadcast:
- Camera: While most smartphones boast quality built-in cameras, investing in a DSLR or mirrorless camera may offer even better video quality.
- Tripod: A steady shot will make your broadcast more professional. A tripod – or even a simple smartphone stand – will save you from shaky footage.
- Microphone: Audio quality is critical for a successful live stream. Consider using a smartphone-compatible lapel microphone or a directional microphone for better sound.
- Lighting: Proper lighting helps you stand out in your broadcast. Whether you opt for an affordable ring light or a professional softbox setup, make sure your subject is well-lit.
- Reliable Internet Connection: Ensure that your Wi-Fi or mobile data connection is stable before going live to avoid frequent buffering or low-quality footage.
Choosing a Location and Setting up Your Camera
Once you have your tools and equipment sorted, the next step is determining an appropriate location. Be mindful of the background and surroundings – they should complement, not distract from, your message. Consider factors such as lighting, ambient noise, available space, and visual appeal. You ideally want a quiet, well-lit, and clutter-free space, offering a clean backdrop for your broadcast.
Now that you’ve settled on a location set up your camera with a viewer’s perspective in mind. Frame your shot so that you occupy the central part of the screen. Make sure there’s enough headspace, but not too much; you want to fill the screen without crowding it.
Crafting an Engaging Title and Description
A crucial part of setting up your Facebook Live stream is creating a compelling title and description. An engaging title grabs the viewer’s attention and communicates the value of your broadcast. Keep it concise, clear, and intriguing. Don’t forget to mention if there’s an incentive for viewers to tune in (e.g., exclusive content, discount codes, or giveaways).
On the other hand, your description provides room for additional information. Outline the topics you’ll cover or any guests that may appear in your livestream. Don’t be afraid to incorporate emojis or interesting phrases.
By the end of this first section of our “How to Go Live on Facebook: A Comprehensive 2025 Tutorial,” you should feel confident in setting the stage for a successful Facebook Live experience. In the next section, we’ll walk you through the process of going live and interacting with your viewers.
Going Live on Facebook
Now that we’ve covered the groundwork, it’s time to dive into the practical steps of broadcasting live on Facebook. In this part of our “How to Go Live on Facebook: A Comprehensive 2025 Tutorial,” we outline a step-by-step guide on going live, understanding different types of Facebook Live broadcasts, and engaging with your audience during the broadcast.
Step-by-step Guide on Going Live
Ready to hit that live button? Follow these steps:
- Open the Facebook App: Log into your Facebook account and navigate to the page, group, or profile where you want to go live.
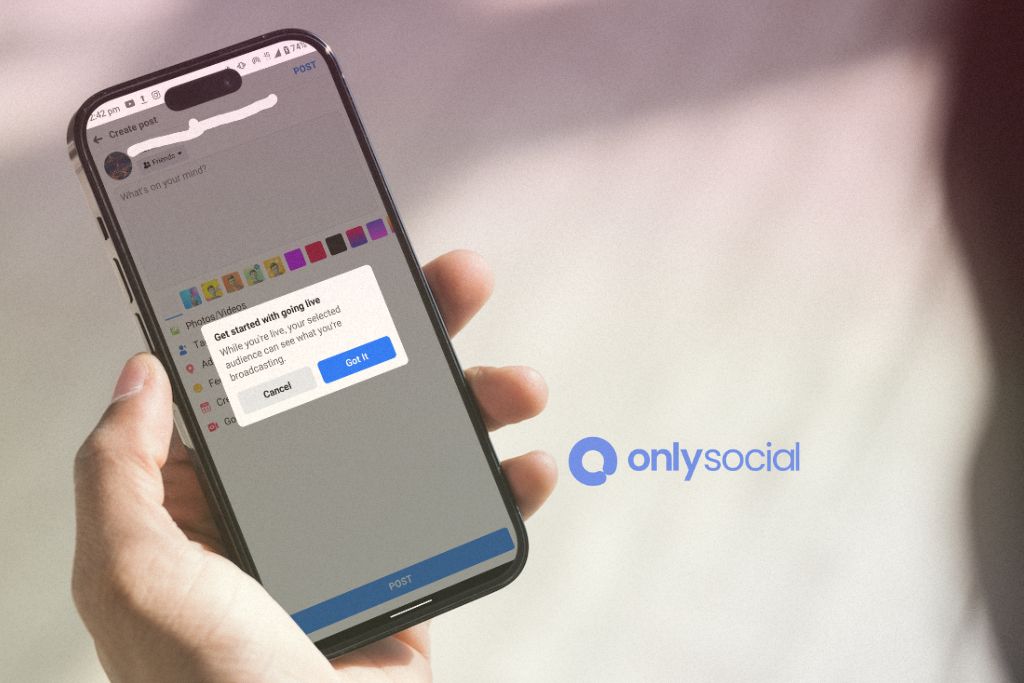
- Tap ‘Live’: You’ll find this option under the post composer box or the ‘What’s on your mind?’ section.
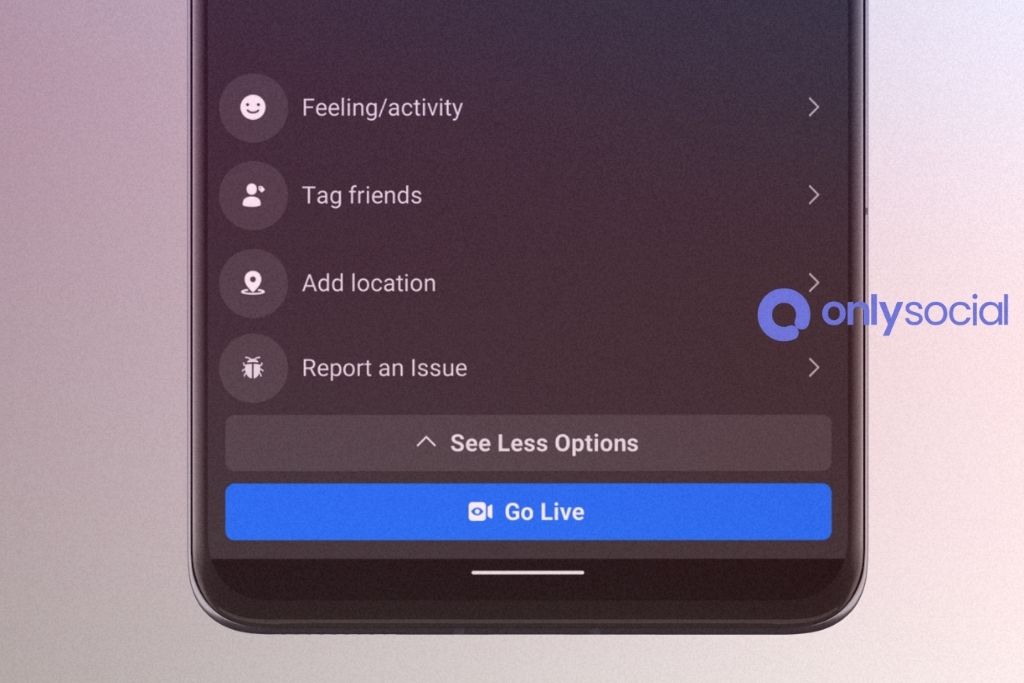
- Set Up Your Live Video: Write a compelling description, choose your audience, and then set up your camera.
- Go Live: Tap the ‘Start Live Video’ button, and you’re on the air! Bear in mind there’s a slight delay, so give it a few seconds before you start.
Understanding Different Types of Facebook Live Broadcasts
Facebook Live isn’t one-size-fits-all. Depending on your goals and audience, you may choose different types of broadcasts:
- Question & Answer Sessions: These informal and interactive sessions are a great way to build stronger connections with your audience.
- Behind-the-scenes: Show your audience a different facet of your brand or life by letting them in on what happens beyond what they typically see.
- Tutorials or How-Tos: Share your knowledge in a specific area. This is especially fitting if your brand revolves around certain products or skills.
- Interviews: Interviewing a guest can add fresh perspectives and values to your live content, drawing in their audience as well.
Engaging with your Audience During Broadcast
Once you’re live, remember that Facebook Live isn’t a monologue—it’s a conversation. Encourage viewers to leave comments, respond to them in real-time, and weave their input into the content of your live video. Show enthusiasm and keep your energy levels high to maintain audience engagement.
Congratulations! With this section of our “How to Go Live on Facebook: A Comprehensive 2025 Tutorial,” you’re now well-equipped to execute a successful live broadcast. Up next, we’ll wrap up with what to do after your Facebook Live.
After Your Facebook Live
So, you’ve just finished your first live broadcast on Facebook. Congratulations! But wait, the process isn’t over just yet. In the final section of our “How to Go Live on Facebook: A Comprehensive 2025 Tutorial,” we’ll walk you through the steps to effectively close off your livestream and ensure that it continues to engage viewers long after it has ended.
Saving and Sharing Your Broadcast
As soon as you end your live video, Facebook gives you the option to save your video. Click on ‘Save to Camera Roll’ if you wish to have a copy stored on your device. You can use this saved video for future promotions or repost on other social media platforms.
Next, make sure to share your live video. It now becomes a part of your page’s video library and can be found by anyone visiting your page. Consider pinning the video to the top of your profile or page to gain maximum visibility.
Maximizing the Impact of Your Facebook Live Video
After wrapping up your live broadcast, your job isn’t entirely done. There are several ways to maximize the impact of your Facebook Live video:
Analyze Your Broadcast: Go through the statistics provided by Facebook – peak live viewers, total reach, reactions, comments, and shares. These insights can help you understand what worked and what didn’t, ultimately guiding your future Facebook Live strategy.
Engage with Comments: Scroll through comments you might have missed during your live video, and make sure you respond. It’s always a good practice to keep the conversation going even after the live broadcast has ended.
Promote Your Replay: Share a link to your live video across all other social media platforms, encouraging those who missed the live event to catch the replay.
Create a Blog Post or Recap Video: You can use the saved video to create a brief recap or a detailed blog post about the live event. This further extends the life of your live content and allows anyone who missed out to get a quick recap.
Wrapping Up
And that brings us to the end of our comprehensive guide on “How to Go Live on Facebook: A Comprehensive 2025 Tutorial”. Learning how to navigate Facebook Live and use it effectively requires practice and patience — don’t expect perfection from your first broadcast. But with each attempt, you’ll find yourself becoming more comfortable and skillful at handling live video.
Next up — it’s time to pick up your phone (or camera), hit that live button, and start creating meaningful real-time connections with your audience. Best of luck with your Facebook Live journey!
BONUS
Live streaming on Facebook is a fantastic way to connect with your audience in real-time, but what about managing your overall social media presence effectively? That’s where OnlySocial’s Post Planning and Scheduling function shines. This powerful tool allows you to plan and schedule posts across multiple social networks seamlessly. Imagine the ease of managing unlimited social profiles and enjoying the freedom of unlimited posting. OnlySocial streamlines your social media strategy, ensuring consistent engagement with your audience. Why not experience this efficiency firsthand? Sign up for a commitment-free 7-day trial today.
Frequently Asked Questions
Do I need a professional camera to go live on Facebook?
No, you don’t necessarily need a professional camera to go live on Facebook. Most smartphones come equipped with high-quality cameras that are more than suitable for Facebook Live. However, if you’d like to elevate the video quality, you may consider using a DSLR or mirrorless camera.
Can I go live on Facebook from a desktop or laptop device?
Yes, you can go live on Facebook from a desktop or laptop computer. To go live from your computer, simply log into your Facebook account, visit your profile, page, or group, and click on the “Live” button. You’ll need a webcam or an external camera to broadcast video from your computer.
How long can my Facebook Live video be?
Facebook Live videos can be up to 8 hours long when broadcasting from your computer or mobile device.
Who can see my Facebook Live video?
Your Facebook Live video’s visibility depends on the privacy settings you choose when setting up your live stream. You can make your video public, visible to friends, visible to specific friends, or visible only to yourself.
Can I schedule a Facebook Live video in advance?
Yes, Facebook allows you to schedule a live video in advance. This feature is available for Pages and can help increase anticipation and online attendance for your broadcast.
Can I block specific viewers from watching my live video?
Yes, you can block specific viewers from watching your Facebook Live video by adding them to your ‘Restricted List’ before the broadcast. However, keep in mind that they might still be able to watch the video if a mutual friend shares it.
Can I download the video after my Facebook Live has ended?
Yes, you can download your Facebook Live video once it has ended. Navigate to your video library, click on the video’s option button (‘…’), and you’ll find the option to ‘Download’ the video to your device.
Can I edit my Facebook Live video after the broadcast has ended?
Yes, you can edit the description, audience, and other settings of your video even after the live broadcast has ended. However, Facebook does not provide built-in tools to edit the video content itself. To accomplish this, download the video, edit using external software, and re-upload the edited version to your profile, page, or group.
Will my viewers be notified when I go live?
Yes, Facebook notifies your friends and followers when you go live, depending on their notification settings. To increase reach, viewers can also choose to ‘Subscribe’ to your live videos during the broadcast to receive notifications every time you go live in the future.